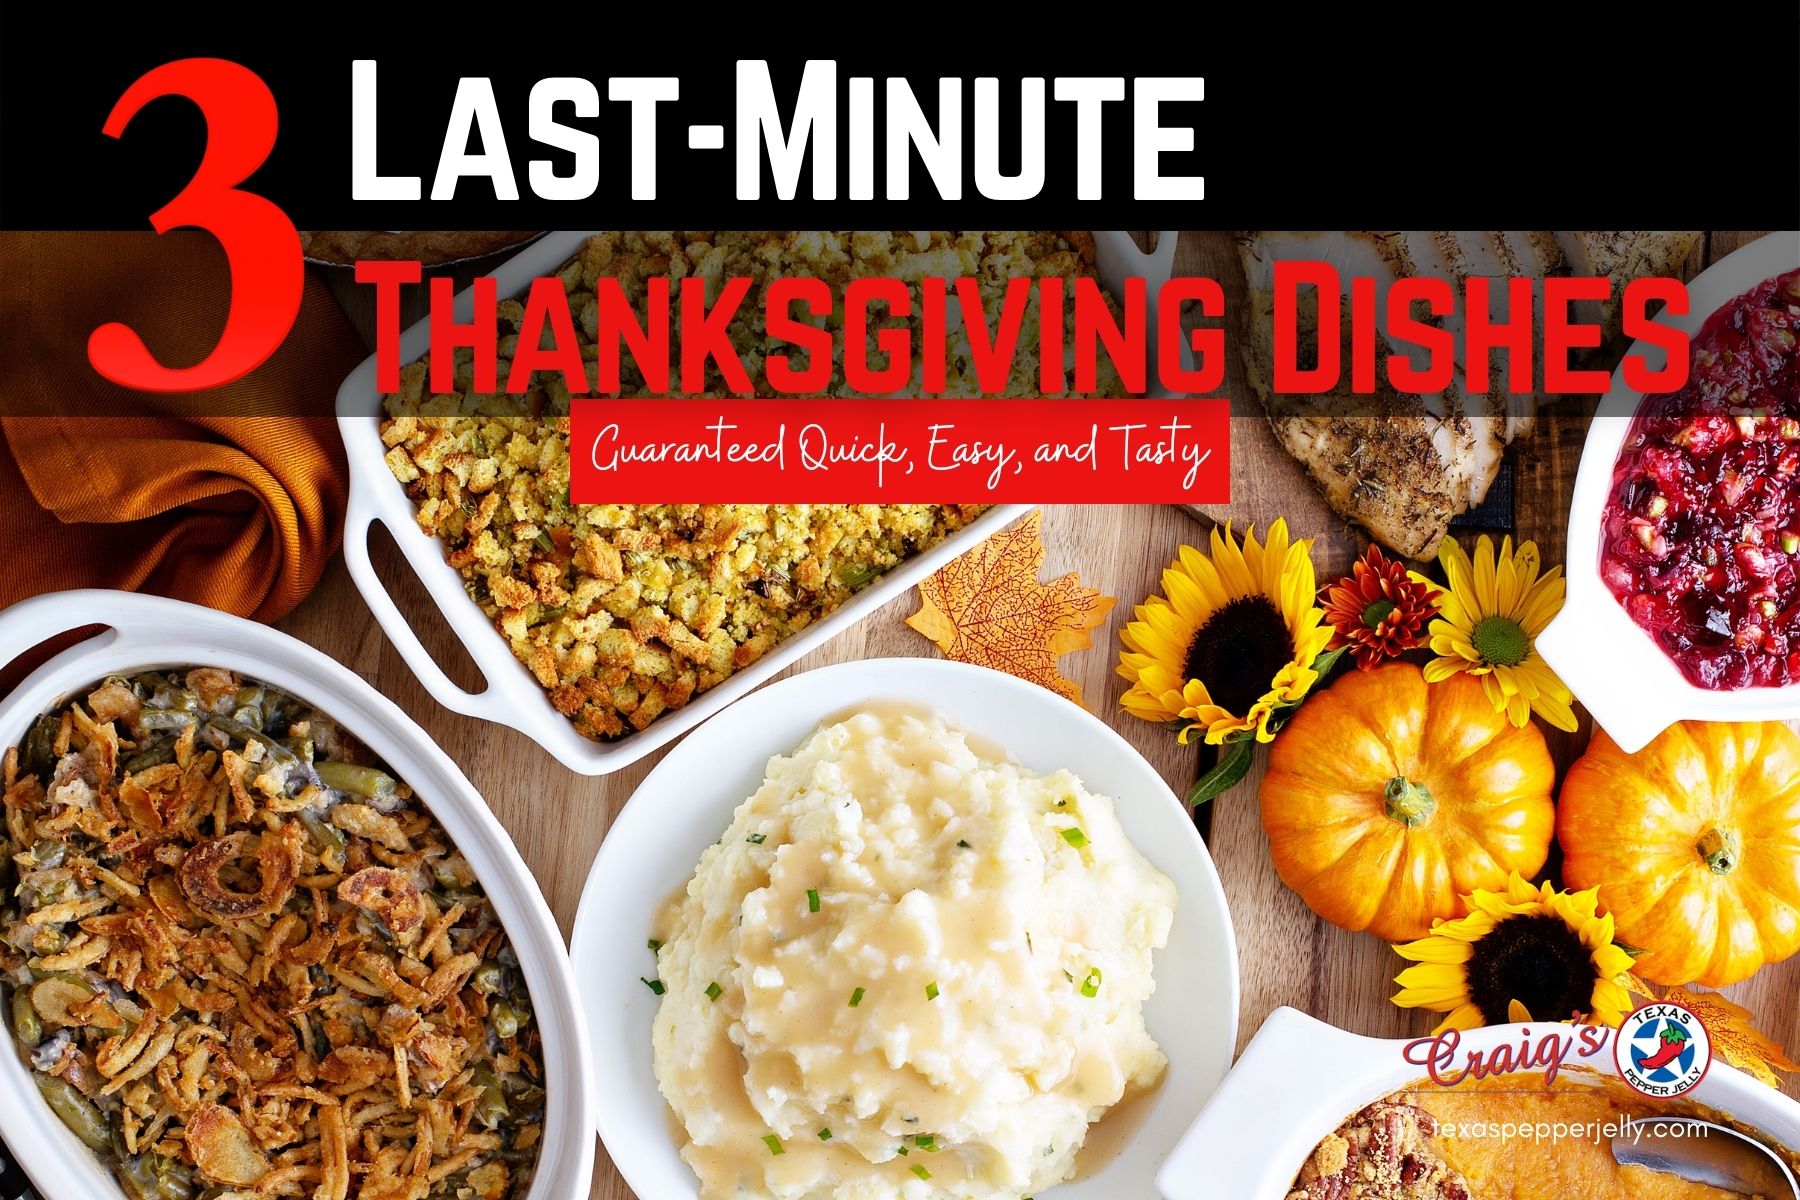

Let the feasting commence! It is upon us; the one time of year when filling up your plate twice is expected (as is a nap!). Creating a spread large enough to feed those who gather and leave plenty of leftovers for a few days is no easy task. Many a pro has arisen Thanksgiving morning, missing a few sides to go with the day’s banquet. Don’t fret. We’ve got some quick, easy, and tasty side dishes you can throw together last-minute that’ll please the hungry masses awaiting a spot at your dining room table or the kiddie table if that’s where they belong.
Texas Style Green Bean Casserole Recipe
Green bean casserole is a Thanksgiving tradition for many families, and most use the same boring Campbell’s Soup recipe each year.
Here at Texas Pepper Jelly, we make it just a little different. We add the heat! We love the dish, but it just needed a little more pop for our taste.
Of course, our recipe doesn’t have to be a holiday exclusive, it’s great any time of year…family reunions, birthday parties, and meals with friends.
PREP TIME 20 mins COOK TIME40 mins SERVINGS 10 servings
EQUIPMENT
- 9″x13″ casserole dish
- Can opener
- Silicone spoon or spatula
- Cutting board
- Chef knife
- Measuring cups
- Measuring spoons
INGREDIENTS
- 1 10.75 oz can Campbell’s Condensed Cream of Mushroom Soup
- ½ cup milk or cream
- ½ cup onion finely diced
- 1 cup Cheddar cheese shredded
- ¼ cup red bell pepper diced
- ¼ cup green bell pepper diced
- 4 slices bacon finely chopped
- ¼ cup Texas Pepper Jelly Pineapple Habanero
- ¼ cup pineapple shredded (canned is fine)
- 1 tsp soy sauce
- dash black pepper
- dash salt
- 4 cups green beans (fresh, frozen, or canned; just be sure they’re cooked and well-drained!)
- butter
- 1⅓ cups French’s French Fried Onions hold 1/2 cup back for topping
INSTRUCTIONS
- Heat oven to 350° F.
- Butter the casserole dish.
- Dice the onion and peppers.
- Finely chop the bacon.
- Pour all the ingredients into the casserole dish, minus the 1/2 cup of French’s fried onions you are holding back.
- Bake for about a half-hour at 350° F. Watch the casserole carefully; when it begins to bubble, open the oven and stir thoroughly. Bake for another ten minutes.
- Remove from oven, and sprinkle the remaining 1/2 cup of french fried onions over the top. Return to oven for about five more minutes, or until the onions are golden brown.
- Serve hot or cold. We prefer the green bean casserole to be hot, but many people like it cold.
Although using fresh or frozen beans add to your prep and cooking time, everybody likes options, so here you go:
If using fresh green beans
- If you use fresh green beans, you’ll need to cook them thoroughly before using them in your casserole.
- Once your beans are cooked, add them to the recipe just like you would if they were canned.
If using frozen green beans
- If you want to use frozen green beans, you’ll want to let them thaw before adding them to your dish. Be sure to plan for the needed thawing time if using frozen—about 2 hours.
Spicy Cranberry Salad Recipe
Is this just cranberry sauce with a different name? No, it isn’t.
It can be confusing. Spicy Cranberry Salad or cranberry sauce? They are not the same thing. We take the already fabulous red cranberry salad recipe and add our Texas Pepper Jelly twist to it. Our product addition will make the best cranberry salad you’ve ever eaten, hands-down. It’s best to let it chill for about 4 hours, but we rather enjoy it a bit on the warm side.
PREP TIME 20 mins CHILL 4 hrs SERVINGS 8 servings
EQUIPMENT
- Medium pot
- Wooden spoon
- Food processor/blender or chef’s knife and cutting board (if you prefer your cranberries chopped up)
- Medium serving bowl
INGREDIENTS 
- 12 oz fresh cranberries frozen cranberries will work, too
- ¼ cup Texas Pepper Jelly Apple Cranberry Habanero Rib Candy
- 1 tart apple (pink lady is a good option)
- ½ cup pecan pieces
- ¾ cup sugar
- 2 tbsp orange juice
- 1 tbsp lemon juice
- 1 tbsp orange peel or lemon peel finely grated (either or use both enough to equal 1 tbsp)
- ½ cup maple syrup
- ¼ cup pineapple finely shredded
INSTRUCTIONS
- Put all ingredients except the pecans into a medium saucepan and mix thoroughly.
- Stir continuously (don’t leave them!) until the mixture comes to a rolling boil.
- Turn the heat down and continue stirring for about ten more minutes or until the mixture starts to thicken.
- The cranberries will have begun to soften, and many of them will be “popping.” That’s good; you want them to pop!
- Remove from heat and stir in the pecans.
- Pour into a serving bowl, cover, and refrigerate until time to set out for guests.
- We suggest giving it at least 4 hours to get a good chill throughout the entire dish.
Note about cranberry consistency:
- Some people prefer their cranberries to be chopped up fine; go ahead and chop them up or throw them in your food processor/blender if you want a finer consistency.
Deviled Eggs – Texas Style
This recipe for Texas Style Deviled Eggs will be the perfect Thanksgiving dinner companion to our twist on green bean casserole and cranberry salad.
PREP TIME10 mins COOK TIME15 mins SERVINGS12 servings
EQUIPMENT
- Large pot
- Medium mixing bowl
- Silicone spatula
- Fork
- Cake decorating bag and tip
- Plastic wrap
- Chef knife
- Cutting board
INGREDIENTS 
- 12 eggs boiled and peeled
- ¼ cup mayonnaise or Miracle Whip
- ⅛ cup Texas Pepper Jelly Pomegranate Cranberry Habanero Rib Candy or flavor of your choice
- 2 tbsp Dijon mustard (yellow is also useable)
- ⅛ tsp Craig’s All-Purpose Seasoning
- ¼ cup green onion diced
- dash paprika
INSTRUCTIONS
- Place eggs in a large pot for boiling. Cover with water. Be sure the eggs are covered entirely with water.
- Bring the pot with the eggs to a boil on high heat.
- Once you bring them to a boil, remove them from the heat, cover, and let them rest for about 12-15 minutes.
- Rinse with cold water and peel. Sometimes peeling under running water makes the shells come off easier.
- Slice each boiled egg in half lengthwise. Remove the yolks and place them in a medium mixing bowl.
- Arrange the egg whites on a decorative tray or a tray made especially for deviled eggs.
- With a fork, mash up the yolks in a mixing bowl until they resemble a yellow powder.
- Add the Craig’s All-Purpose Seasoning, mayo, and mustard. Stir together with the fork.
- Add the Rib Candy a little at a time until you’ve reached a good “filling” consistency. You can add more rib candy if you want a thinner consistency. The flavor of Rib Candy you choose can make the amount you use vary.
- Layout a piece of plastic wrap on the counter. Use the spatula to scrape the yolk mixture onto the wrap…almost up to one edge. Now wrap the mixture up like swaddling a baby and slide the wrapped up mixture into your cake decorating bag open end first. Be sure your preferred decorating tip is already attached to the bag. A star-shaped tip will give you a nice swirled effect.
- *** If you don’t have decorating bags or want to do a quicker method, just put the egg yolk mixture into a ziplock bag. Push the air out and tightly seal! Cut a small hole on one of the bottom corners by snipping off the corner removing a small triangle piece. The smaller you cut it, the better for the first egg. This way, you can adjust it to the size by recutting if necessary. ***
- Fill each egg with the mixture. Be sure not to over-fill. You don’t want to run out of filling. You can always go back and add more to the eggs that look like they don’t have enough filling.
- When all the eggs are filled, sprinkle the diced green onions over the tops. Cover, and place in the refrigerator until it’s time to serve.
- Just before serving, add the paprika for additional color and taste. Shake a small amount on top of each deviled egg.
We know this was all about quick, easy, and tasty Thanksgiving side dishes, but we figure ’tis the season for giving, and let’s face it, Thanksgiving dinner isn’t the same without a slice (or two) of delicious pumpkin pie. Without further ado, here’s your bonus recipe:
Apple Cinnamon Pumpkin Pie Recipe
This is definitely not your grandma’s pumpkin pie. We take her traditional recipe and take your tastebuds on a new journey with our addition of our Rib Candy.
If you want to change up things a little when serving pumpkin pie, this is the recipe for you. It does take time to make a pumpkin pie, so plan for the time in the kitchen. And always read the entire recipe before making it so that you don’t get started and find you don’t have an ingredient. We know your whole crew will enjoy this one… even grandma will like it!
PREP TIME 35 mins COOK TIME 55 mins SERVINGS 8 servings
EQUIPMENT
- Pie pan
- Large mixing bowl
- Small mixing bowl
- Measuring cups
- Measuring spoons
- Whisk
- Silicone spatula
- Can opener
INGREDIENTS

- 2 cups pumpkin puree canned or fresh
- ¾ cup milk
- 1 cup light cream
- 3 eggs beaten
- ¼ cup Texas Pepper Jelly Apple Cinnamon Sweet Rib Candy
- ½ cup brown sugar
- ½ cup sugar
- 1½ tsp ground cinnamon
- ¼ tsp salt
- ½ tsp nutmeg
- ¼ tsp ground ginger
- ¼ tsp ground cloves
- 1 tbsp flour
- 1 unbaked pie crust large
INSTRUCTIONS
- Preheat oven to 450° F.
- In a small bowl, stir your dry ingredients together.
- In a large bowl, beat your eggs. Add the rest of the ingredients in the above list except the pie crust.
- Make sure all the ingredients are blended well.
- Add the dry mixture into the large bowl of ingredients, stir until well blended. You can use a whisk or a blender on low for this. Don’tspeed it up too fast because it will splatter.
- Pour the mixture into the pie shell. We like a deep-dish pie crust so that we don’t have any extra pie filling.
- Line a baking sheet with parchment paper to set the pumpkin pie in the oven. Makes for easy cleanup.
- Bake for 10 minutes at 450° F. Reduce the temperature to350° F and bake for 45-60 minutes until the filling has “set” and the crust is nicely browned.
- Your bake time can vary depending on the accuracy of your oven.
- After 45 minutes, keep checking every five minutes or so. The toothpick test is usually pretty accurate for pie filling. You want the toothpick to come out clean—no runny liquid or gooey stuff sticking to it.
- Let the pie cool on a cooling rack. You can chill it even further in the fridge if you desire. Be sure to use plastic wrap to cover a pumpkin pie until you are ready to serve it.
- Once it’s ready to serve, dollop it with whipped cream. The touch of zingy spice from the Rib Candy, and the hint of apple in it, too, will turn your pumpkin pie from ordinary into spectacular.
Happy Thanksgiving, enjoy!